How can we make our drawings more realistic by creating the illusion of form or 3 dimensional objects?
ASK
ASSIGNMENT PART A:

What is the difference between a shape and a form?
How are each achieved?
Write a definition for each in your sketchbook.
Shape - enclosed area that is two dimensional - having height and width -can be geometric such as a circle, square or rectangle; free form, or organic. Appears flat.
Form appears to be, or actually has, height, width and depth. Suggests or has mass, volume.
Value refers to relative lightness or darkness of a color. Applying a range of values to a shape can create the illusion of volume or mass - a three dimensional form.
EXPLORE
Watch this video through 3:00 min Shading: 3 Tips on how to Shade
Write down the 3 tips in your sketchbook

Want to know more about your drawing pencils? Although most of us have heard someone refer to the material within a graphite pencil as "lead", you may be surprised to learn that there isn't any lead there at all. Instead, graphite is a form of carbon and is completely safe for drawing. Graphite is produced in various grades or degrees according to the softness or hardness of the material. Different grades produce different types of marks. The grade of the pencil is usually designated on the side or the end of the pencil. For drawing pencils, this designation is an alphanumeric value. Writing pencils differ in how they are categorized and usually only feature a number. For example, a #2 pencil is a standard writing pencil - which happens to be of the same softness as an "HB" drawing pencil. Grades of drawing pencils are organized in a scale based on softness or hardness. An "HB" pencil is found directly in the center of the scale. "H" pencils feature harder graphite. (The "H" stands for "hard".) "B" pencils feature softer graphite. (The "B" stands for "black".) The number found in front of the letter reveals just how soft or hard the pencil is. In other words, a "4H" pencil is harder than a "2H" pencil while a "4B" pencil is softer than a "2B" pencil. Harder pencils produce lighter marks since less of the material is released as pressure is applied. Softer pencils make darker marks since more of the material is released. Therefore, a "4H" pencil will produce lighter marks than an "2H" pencil while a "4B" pencil will make darker marks than a "2B" pencil. The "F" pencil is similar in mark to an "HB" pencil, only slightly lighter. Like an "HB" pencil, it is capable of producing darker and lighter marks, but without any extremes. The graphite material found in an "F" pencil is slightly harder than an "HB" pencil meaning that it can stay sharp for a longer period of use. For this reason, this pencil is designated as "fine" which is why this pencil is labeled with an "F".
1. Try each pencil and label it with the associated number / letter as illustrated above.
2.
Create an 8 step value scale using the Ebony pencil. Shift values by gradually increasing pressure during application.
To create the scale:
Place your ruler across your sketchbook horizontally. Trace each edge for the length of the scale. Place your ruler vertically across the page and trace each side for the width of each step on the scale.
Label the exercise " Value Scale"
3.. Create a second scale utilizing a colored pencil. Choose a darker color vs. a lighter one.


WHAT YOU SHOULD AIM FOR:
SHADE IN ONE DIRECTION
PRESSURE IS KEY!
NO VALUES REPEAT
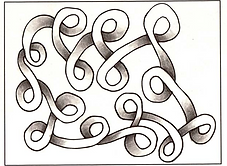
Fun practice - create a pattern and try shading it to achieve a sense of form.


ASSIGNMENT PART B :
Let's try shading a form.


Practice achieving a smooth gradient.

Assignment: Practice shading forms in class.
Drawing goals:
____ Start loosely - hold pencil to side, move from shoulder
____ Gradually and smoothly vary the pressure on our pencil to create a range of values
____ Evenly shade the form with consistent strokes following the contour of the form
____ Capture the primary highlight (white of paper, midtones, core shadow, cast shadow and reflected light.
____ Include table or paper edge, surrounding space values, note that cast shadows have multiple values.


ASSIGNMENT PART C :
IMPROVE
Assignment: Set Goals for Yourself.
Before moving on to additional practice, in your sketchbook take a moment to reflect on what you are learning.
Refer to the shading goals and write
-
2-3 of the techniques that you feel very comfortable with and that are working well for you.
-
List 1-2 things that you would like to improve or focus on in your next drawing.
Gradually + Smoothly applying pressure to your pencil
Achieving a full range of values from dark to light
Reserving the white of the paper for brightest highlight
Capturing mid-tones, core shadow, reflected light and cast shadow


Gradient Shading Practice
Utilizing Graded Graphite Drawing Pencils
Copy these four forms onto one page in
your sketchbook. Place them in the same
spots on your page as seen in this illustration.
Refer to the paper on your table with the
shaded forms for reference.
All four forms should fill the page with space
under each for cast shadows.
For this exercise, including the table edge and
negative space is optional.

CONTINUE TO PRACTICE:
-
Gradually and smoothly varying the pressure on your pencil to create a range of values
-
Evenly shading the form with consistent strokes following the contour of the form
Class goal: Utilize smooth gradient shading to illustrate form utilizing graded graphite pencils.
Watch this video example starting at 1:45 - 2:40
1.Begin shading the sphere. Identify light source coming from upper left corner. Leave brightest highlight the white of the paper.
2.Start with a 2H pencil for application of Core Shadow.
3.Switch to a 4B pencil to layer over the 2H and darken the core shadow. Use the 2H pencil to go over top and smooth out any texture marks. **Leave some of the lighter 2H showing through where there is reflected light from the table.
4. Use a 4B to draw the cast shadow, then a 6B to darken the area closest to the form, gradually lightening as it moves away from the object.

Next, shade the Cube, followed by the Cylinder and then the Cone - in the same manner.
Check your work against the test strips on your table - How many values can you count?
Finally - at the bottom of the page - REFLECT
-
Re-visit the goals you set for yourself - Write one or two techniques you improved in this exercise.
Compare your ebony pencil sketch with your Graphite pencil drawings
Describe which media you feel you were able to gain the most values and realism with.

